Intervention Con in Ten Points or Less


intervention con hotel 2014

From August 22 to the 24, I was at Rockville, MD for Intervention Con!

It was my first time at this particular convention (and my first time in Maryland, really). It was a get-together to celebrate webcomics, gaming, and an awful lot of Doctor Who.

I could overload you with details about the convention, but I’m going to condense everything into ten points or less so I won’t overwhelm you.

1) If you ever find yourself going from Ohio to Maryland, do yourself a favor and take Interstate 79 to Interstate 68, then onto Interstate 270. That way you can avoid Pennsylvania’s ridiculous tolls.

2) Take a hoodie. The air conditioning in the artist alley this year was freezing. I’m grateful I brought mine.

3) When there are no con-goers coming in to spend money (as happened a lot at this particular convention), talk to the other artists and make some new friends. That’s how I met the folks behind Shadowbinders, Bartez, Capes N Babes, and Lost Gamers as well as lovely artists like Magical Tea Time, K.S. Brenowitz, Tico Illustrations, and Kelsey Wailes (OK, gratuitous name dropping is done for now).

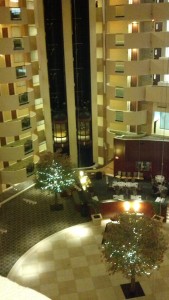
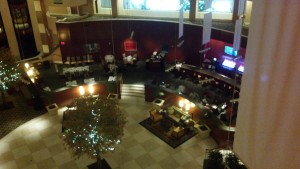
4) The Hilton that the convention took place in had the strangest elevators. Here’s a few pictures of the lobby to give you some context.

2014-08-22 16.01.36 2014-08-22 18.34.05

So you see how there are elevators in the corners? Some of them run only from the third floor to the seventh. Some run from the first floor to the sixth. There are more elevators that will run from other strange floor combinations. You may have noticed there are eight floors in the hotel. Whoever decided these elevators were a good idea must have been H.P. Lovecraft himself.

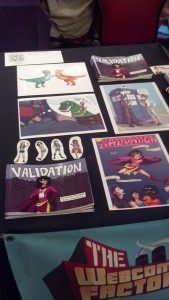
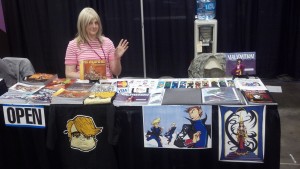
5) I almost forgot! This was the table I set up with.

intervention con table 2014-08-23 12.04.12

I wasn’t listed as a guest because the billing was mostly given to Christian (the writer of Validation) and Tony DiGerolamo (from The Webcomic Factory). But I was the one with the prints and stickers for Validation, so along I went!

And now I have the books, which leads me to…

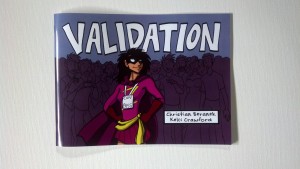
6) There are some extra copies of the Validation Comic Con Special! You can get them now on my online store. There’s only five copies left, and if you order them, they’ll be signed by Christian and me. Plus, you’ll get a bonus print for your wall from me!

validation comic con special book print

Speaking of prints…

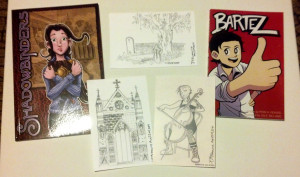
7) I got some new books and art from some awesome folks this past weekend.

intervention con grabs comic books prints

I’ll be reading the books and reviewing them in a new blog segment called “Review Day Tuesday.” It’ll appear on (surprise!) Tuesday.

And the prints? Will be on the wall soon.

8) If you’re ever in Rockville, MD, please for the love of all raw fish go and eat at Rolls N Rice sushi bar. The gang I went with and I had lunch there throughout the weekend, and every time we went it was all delicious!

There were other places we went out to eat, as well, but I didn’t catch their names. There was a Mexican restaurant that had the most delicious roasted duck (with olives) I’ve ever had the pleasure to stuff my face with.

The convention itself also provided food for the special guests, which was pretty good if you could get it. The food went really fast though.

9) If you’re ever at this con, find alternative parking places besides the hotel. Hotel parking is $18 a night (yeesh!). There are alternatives out there.

And I almost didn’t add this, but what the hey.

10) Sunday was my birthday! So Intervention Con was the best birthday present ever!

I should add a bonus thing: because I met so many great artists this weekend, I’m bringing back a feature I started a while ago, but neglected.

I’m talking about Favorite Artist Friday!

So come back on Friday, when I talk about one of my new favorite artists. I’m not going to tell you who it is yet, though, because it’s a surprise.
How I Make Validation

Last time I spoke about How I Make Johnson & Sir. Today I want to show how I make a comic strip for Validation, the other webcomic I work on, because the process is a little different.

If you ever get lost in the technical bits (especially in the Photoshop section), I explain some of those steps in How I Make Johnson & Sir so hopefully the techno-lingo won’t be so confusing.

Today, I’ll show how I made strip #105.

Step 1: Get the Script

I don’t (really) write Validation. Christian does (though we often talk story ideas over). I wait for her to send the script over to me first, and then…

Step 2: Layouts

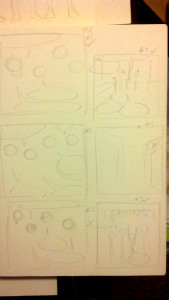
Sometimes I skip this step, depending on how simple or complex the strips are in the script. Since I work in three panels, it’s important to know where characters will be placed and where speech balloons will go, to make the strip as readable as possible. That way it won’t be so cluttered.

I did not do layouts for strip #105 because it was scripted in a pretty straightforward way, and I had an idea for how I wanted the strip to look.

However, I’ll show the layouts I did for #103, which had some weird camera angles.

validation comic layouts
click to enlarge

Step 3: Ready the Paper

I tend to do this step ahead of time. Thankfully I can get two strips from a single sheet of 9 inch by 12 inch Strathmore Bristol Vellum, which is my paper of choice for Validation. I trim the paper (to make it easier to fit on my scanner) and I’m good to go.

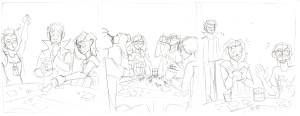
Step 4: Pencil the Strip

validation webcomic strip pencilled art
click to enlarge

Pretty straightforward. Although, if you notice two extra characters, one looks like me and one looks like my boyfriend. Fun fact!

When that’s done, I send the pencils to Christian (via DropBox) for approval. This is where any changes that need made can be done, though 99.9% of the time she gives the ok.

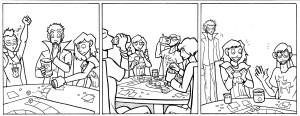
Step 5: Ink

validation webcomic comic strip inked artwork
click to enlarge

Once I get the ok, I ink!

To add a little depth, especially in panel 2, I made the foreground figures in thicker lines to make them pop more. I used a micron pen with a 1.0 width. The background figure in Panel 3 was drawn mostly with 0.5 and 0.3 width pens, with finer details in a 0.1 width micron pen.

Step 6: Color with Markers

My markers of choice are (from most preferred to least)…

  1. Copic markers
  2. Prismacolor markers
  3. Sharpies

I used to do the entire comic in marker, but now I only do half. Sometimes it’s because a marker died, the markers will not blend well for the background, or I need a color I don’t have a marker for. So I just color what I can.

Step 7: Scan and Tweak in Photoshop

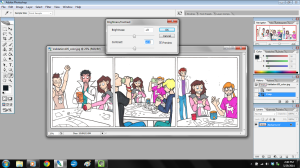
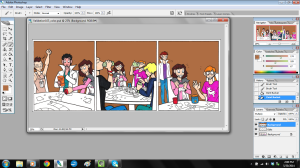
validation webcomic comic strip color artwork in photoshop
click to enlarge

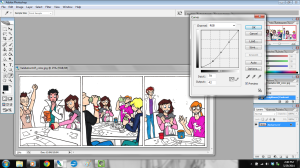
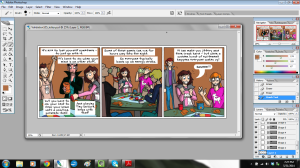
Once marker coloring is done, I scan the strip in at 300 dpi (dots per inch) and open it in Photoshop. The first thing I do is adjust the brightness and contrast (shown in the above picture). That way the strip isn’t so dim. Then I adjust the curves.

validation webcomic comic strip color artwork on photoshop
click to enlarge

Doing this will let the colors really pop.

Once those adjustments are done, I make a new layer in Photoshop and call it “EDITS”. This is the layer where I correct color errors I made with the markers, fix any wonky lines, and clean up smudges and spots.

Step 8: Color the Background

Then I make another new layer on top of that and call it “BACKGROUND”, because here’s where I add background color.

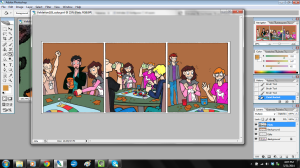
validation webcomic comic strip artwork in photoshop coloring the background
click to enlarge

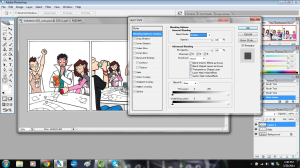
If you notice, I adjusted the blending options for this layer. For “EDITS” I left those settings alone, but with “BACKGROUND” I set it to Color Mode: “Multiply” at a Fill Opacity of 100%.

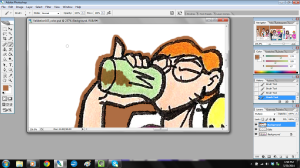
The reason I do this is because Multiply mode actually keeps the lines clean while still coloring. It works like this:

Screenshot 2014-05-30 13.58.57

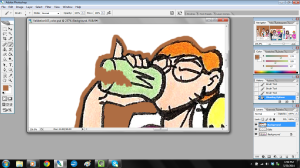
Rather than it looking flat and gross like this:

Screenshot 2014-05-30 13.59.08

Then I just color in the background colors as needed.

validation webcomic comic strip art work in photoshop coloring the background
click to enlarge

Step 9: Color the Rest.

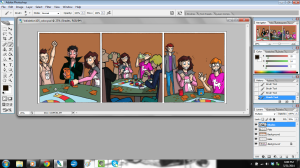
Once backgrounds are done, I make yet another layer on top and call that “FLATS.” I also set this layer to Color Mode: Multiply and Fill Opacity at 100%. This is where I color in the things my markers missed, like Jim’s coat and the game table.

validation webcomic comic strip artwork being colored in photoshop.
click to enlarge

…Sometimes I have another file open to reference for color.

Step 10: Color the Shadows

This step is one I talked about a little bit in my previous tutorial, but here you’ll really see it in action.

I make a new layer on top, call it “SHADES,” and then set to Color Mode: Multiply and – here’s the surprise – Fill Opacity at 35%.

Notice it’s not at 100%? That’s because I don’t want the shadows to be overpowering. I also want the color of the shadows to blend, instead of getting any weird effects that would happen if I changed the paint brush opacity (yes, you can do that).

Once I do that, I color the shadows in, and it looks like this.

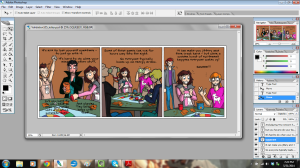
validation webcomic comic strip art being colored in photoshop
click to enlarge

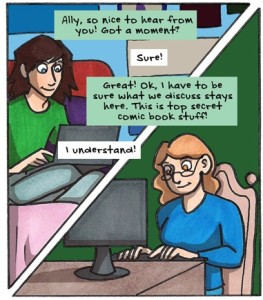
I did something a bit unusual in Panel 2: I put the two figures closest to the reader in shadow. I did this to frame the picture and keep the focus on Ally and Kyle.

So now the colors are done! I save the file, and then flatten the image so all the layers merge. Then I make another new layer and save the file for lettering.

Step 11: Write the dialogue

For this step, I have the open file of the script handy so I can refer to it.

Then I write the dialogue and captions.

validation webcomic comic strip lettering done in photoshop
click to enlarge

I try to arrange them in such a way that they won’t block too much of the art, and to ensure it can be read easily.

Then, once everything is written and checked for spelling, I get to the bottom layer, make a new layer, and start placing the balloons and boxes with the rectangle tool.

validation webcomic comic strip speech balloons and dialogue added to the final art
click to enlarge

I use the rounded rectangle for dialogue and the plain rectangle for narration.

To make the tail for that balloon, I got to the bottom layer again, made a new layer, and painted it in.

Once all of that is done, I merge the layers to flatten it out, and then…

Step 12: Save the File!

I save it first at its current size and call the file “Validation105_large.”

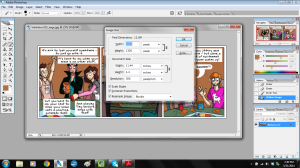
Then I adjust the image size.

click to enlarge
click to enlarge

The large file is at 300 dpi, which is the right size for print, but it isn’t too web-friendly. So to make it nice and tidy for the website, I shrink it from 300 dpi to 100 dpi. And I save that file as “Validation105_small.”

I send the finished strips to Christian via DropBox, and shazam! I’m done!

I hope you enjoyed looking at my process, and I hope you found something useful from it!

I’ll see you again on Wednesday.

Interviews and News Galore

Validation77_promo

During Phoenix Comicon, Christian and I were interviewed for many, many sites.

Now, I finally have some links to share with you.

First off is the review at Land of the Nerds for our webcomic Validation. The review also discusses the “Fake Geek Girl” phenomenon and how our webcomic tackles that issue.

Then we got an interview with Watch Play Read discussing our webcomic, ladies creating comics,  and getting published. The photo there makes me look like a class-A dork, but that’s ok.

And Christian and I got interviewed by Comic Book Resources about the making of Validation.

It was awesome to be interviewed by so many cool and smart people.

Thank you to the interviewers, to the websites and their readers, and especially to you, reader.

You’re awesome!

This Year at Phoenix Comicon…

This was my first year ever at Phoenix Comicon and it was a blast!

I spent most of my days at my table with Christian, the other half of Validation

Christian at the table we shared. The table is covered in comic books and art.

We sold out of copies of Validation by early Sunday afternoon, which is awesome! And I sold out of bookmarks not once, but twice. I even sold out of one of my really old art prints (I’m glad they sold. I’ve been wanting to find them good homes for years).

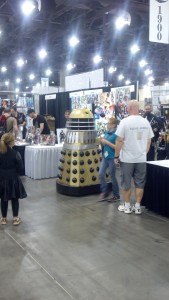
While at the con I saw my first ever Dalek with a voice box and rotating head…

Dalek rolls around the convention floor.


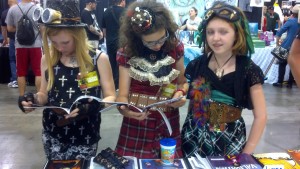
I also got the chance to meet my readers, which was fantastic. I even met new readers, including these girls:

three girls read copies of Validation.

There was also dinner at the Hyatt restaurant and enjoying the nighttime view of the city.

The restaurant itself rotated. It was the first ever rotating floor I ever dined on and it was…surreal.

And creepy.

And sort of terrifying when you’re drunk.

night time view of Phoenix

I also got the chance to have lunch with two guys from Team Four Star. They were really cool people. Later on I got to ask them a question at a panel they hosted. Realistically, theirs was the only panel I was interested in going to that entire weekend. I’m glad I went!

The entire time I was at the con, I was meeting comic artists and former TV producers over dinner, talking to really cool fans, and I even got interviewed twice!

The folks over at Watch Play Read and Land of the Nerds were kind enough to interview Christian and myself at the con. They should be up online soon.

Christian and I will also be appearing in other interviews. I’ll post links when they’re ready for sharing.

Phoenix Comicon treated everyone really well. The complaints were few and far between. Mostly we (the creators and guests) were all excited for the VIP lounges and the food the con provided for us.

The quickest way into my heart is with food, and Phoenix Comicon has won me over.

They had a bowl full of blueberries and it took all of my willpower not to just grab the whole thing and walk off.

Also in their guest lounges, they had toys and games on the tables and you could just take them.

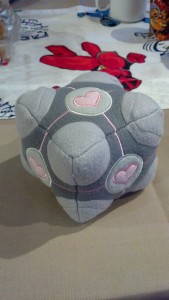
companion cube from portal was a prize in the lounges.
Why yes! I will take a Companion Cube. Don’t even ask!

That’s how I got a Companion Cube and a copy of J.R.R. Tolkien’s translation of Sir Gawain and the Green Knight.

And a dinosaur hand puppet.

I love dinosaurs, in case you can’t tell.

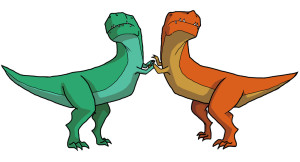
T-Rex Sissy Fight


This past weekend was one of the best weekends I have had in (what historians would call) a long. Ass. Time.

I’ve been sending thank-you messages to the people I met at the con and I still feel like it’s not enough.

The love I felt while I was there was immense. Not just the love for Validation or Johnson & Sir (but there was a lot of that, too!).

There was just such a love for comics and art and pop culture and it was so energizing and inspirational to see the enthusiasm and love everywhere.

Everyone was awesome.

I’m hoping to make it back to Phoenix Comicon next year.

Phoenix Comicon is Here!

Today was the first day of Phoenix Comicon and I had a blast seeing everyone there! (I need to take more pictures).

Thanks to everyone who pre-ordered Validation already!

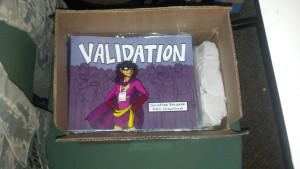
box of copies of Validation Comicon Special

Also, by popular demand, the T-Rex Sissy Fight is being printed tonight and will be sold the rest of the weekend!

T-Rex Sissy Fight

You’re all awesome. Seriously. Thank you for your support!